Understanding Bleed, Margin, Crop Marks & Trim Line: A Guide for Print-Ready Yearbook Artwork
When it comes to creating professional, print-ready yearbooks, getting your layout right is just as important as the content itself. One of the most common areas of confusion is the technical setup—specifically bleed, margin, crop marks, and the trim line. Let’s break down what each of these terms means and why they matter.
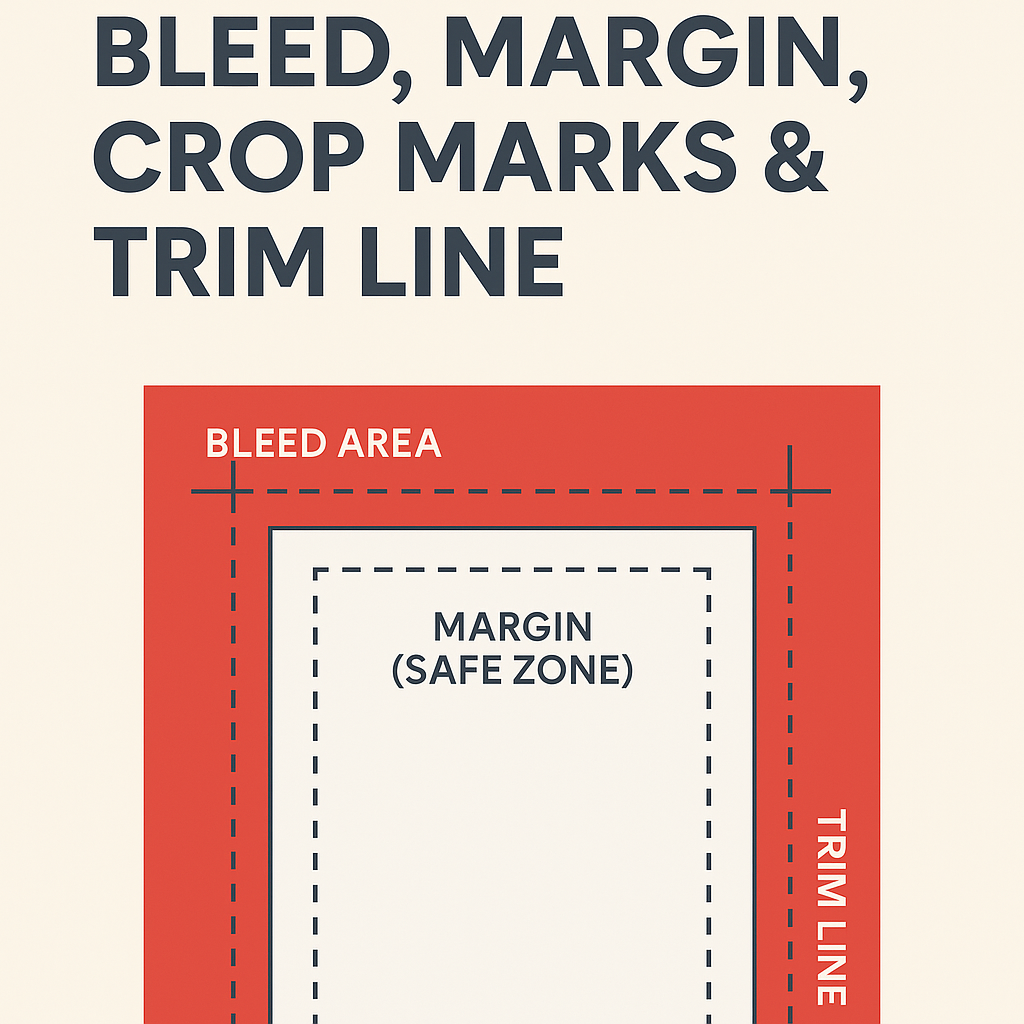
BLEED – Extending Beyond the Page
What is it?
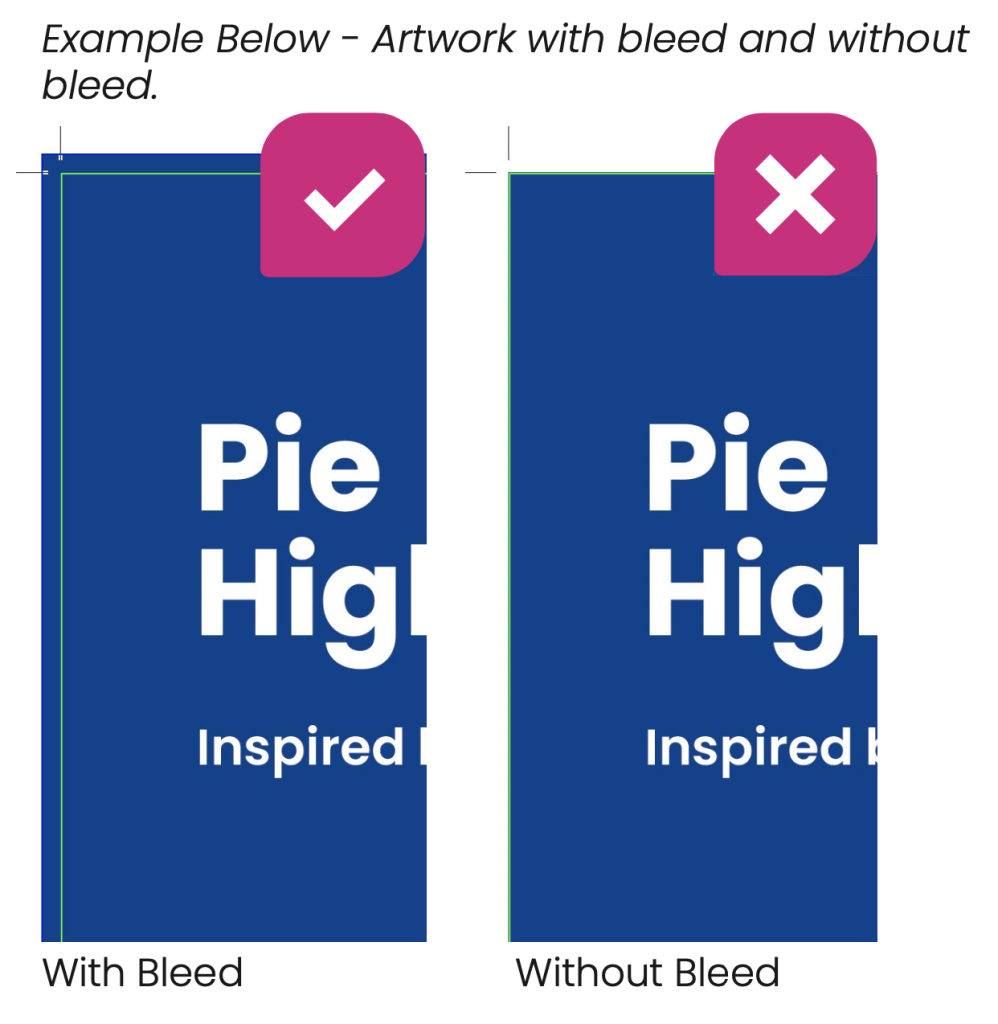
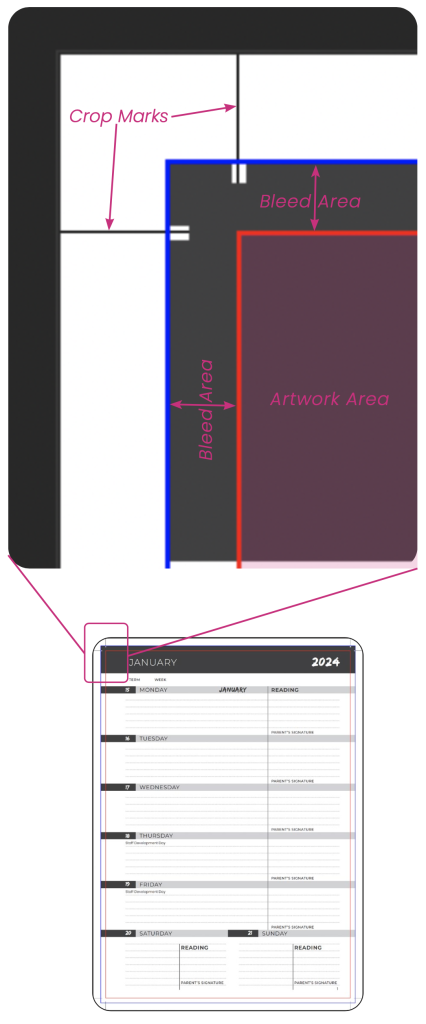
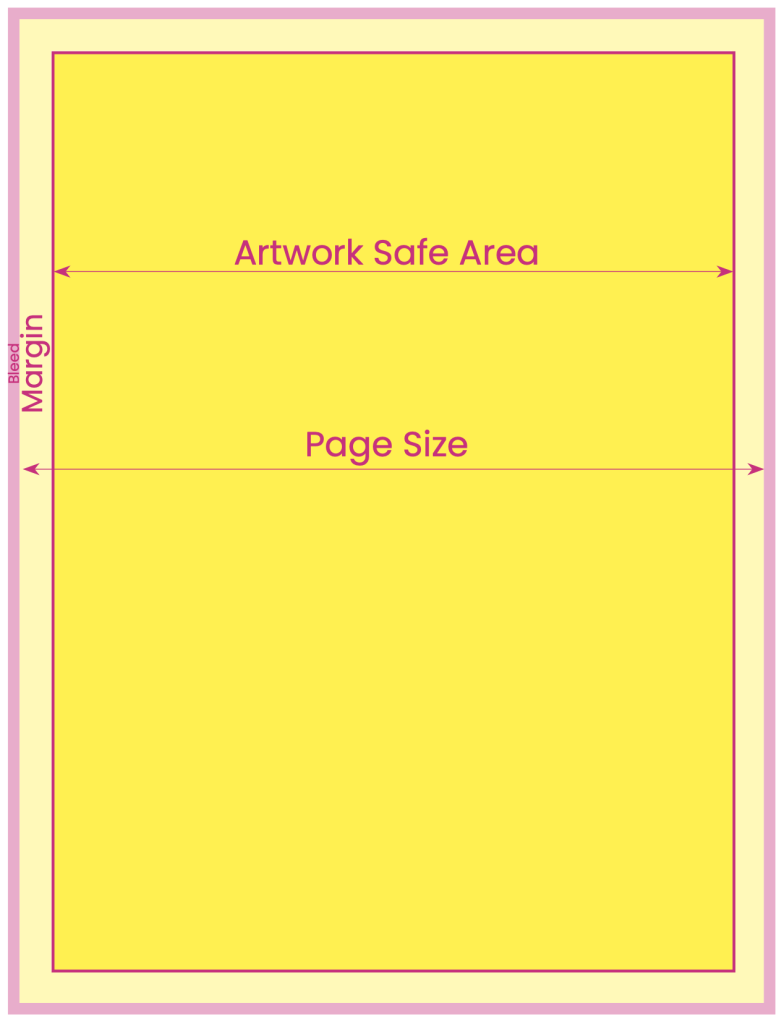
Bleed is the area that extends beyond the final trimmed edge of your page. It ensures that your artwork or background colour goes all the way to the edge without leaving any white borders after trimming.
Why it matters:
During the printing and trimming process, slight shifts can occur. Without bleed, you risk having unwanted white lines around the edges.
How much bleed is needed?
Most printers recommend a 3mm bleed on all sides (check with your printer just in case).
TRIM LINE – The Final Cut
What is it?
The trim line is the intended final size of your printed page. It’s where the printer will cut the paper.
Why it matters:
Everything important (like text, photos, logos) should be kept away from the trim line to avoid being accidentally trimmed off.
CROP MARKS – Guides for the Printer
What are they?
Crop marks (or trim marks) are thin lines placed at the corners of your artwork file. They tell the printer where to cut the paper.
Why it matters:
They act as visual cues for trimming and are especially important when printing multiple pages on a larger sheet.
Note:
Crop marks are typically added in export settings (e.g., in InDesign or Canva when you choose “PDF for print”).
MARGIN (SAFE ZONE) – Keeping Important Content Safe
What is it?
The margin or safe zone is the area inside the trim line where you should place all essential content—text, logos, images that must not be cut off.
Why it matters:
It ensures that nothing critical gets too close to the edge and possibly lost during trimming.
Recommended margin size:
Usually 5mm to 10mm inside the trim line.
AT A GLANCE
Term |
Location |
Purpose |
Recommended Size |
|---|---|---|---|
Bleed |
Outside the trim line |
Prevents white edges after trimming |
3mm |
Trim Line |
Where the page is cut |
Final size of the page |
Actual document size |
Margin |
Inside the trim line |
Protects important content |
5–10mm |
Crop Marks |
Around the edges |
Guides trimming process |
Automatically added |
FINAL TIPS FOR THE YEARBOOK DESIGN
-
Always check your printer’s bleed and margin requirements.
-
Export your PDF with bleed and crop marks turned on.
-
Avoid placing text or faces too close to the edge.