Adobe InDesign is one of the most powerful tools for creating professional-looking yearbooks, but the final step – exporting your file correctly for print – can sometimes feel a little overwhelming.
If your file isn’t set up properly, you may run into issues like cut-off text, blurry images, or colours that don’t look right on paper. To help you get it right the first time, here’s a step-by-step guide to exporting your yearbook from InDesign so it’s 100% ready for print.

OPEN IMAGE IN NEW TAB to zoom in
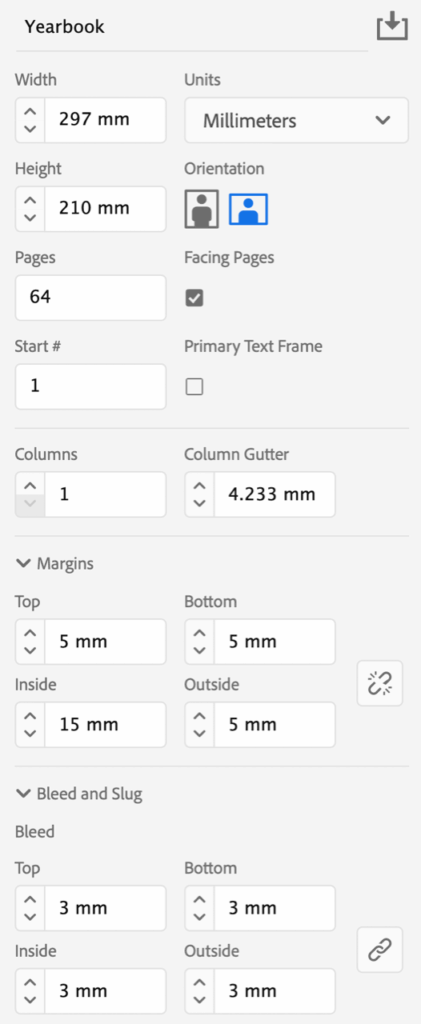
DOUBLE CHECK YOUR DOCUMENT SET UP
Before you even think about exporting, make sure your InDesign file is set up correctly:
-
Page size: Confirm your document size matches the printer’s required trim size (e.g. A4 – check with your yearbook provider).
-
Margins and safe zone: Keep important text and graphics away from the trim area to avoid them being cut off. When setting up a Facing Pages document the margins should be set to 5 mm for all edges except the binding edge which should be 15mm.
-
Bleed: Ensure you’ve set a 3mm bleed on all sides if your design has images or colours going to the edge of the page.
CHECK YOUR IMAGES
-
Resolution: All images should be at least 300dpi for sharp, clear print quality.
-
Colour mode: Convert images to CMYK (not RGB) so colours print correctly.
-
Links: Make sure all images are linked (not missing) by checking the Links panel.
PROOF YOUR FILE
-
Run Preflight (Window > Output > Preflight) to catch any issues like missing fonts, low-res images, or overset text.
-
Do a final check of page numbers, spellings, and alignment.
EXPORT TO PRINT-READY PDF
Now for the important part – exporting your file.
-
Go to File > Export.
-
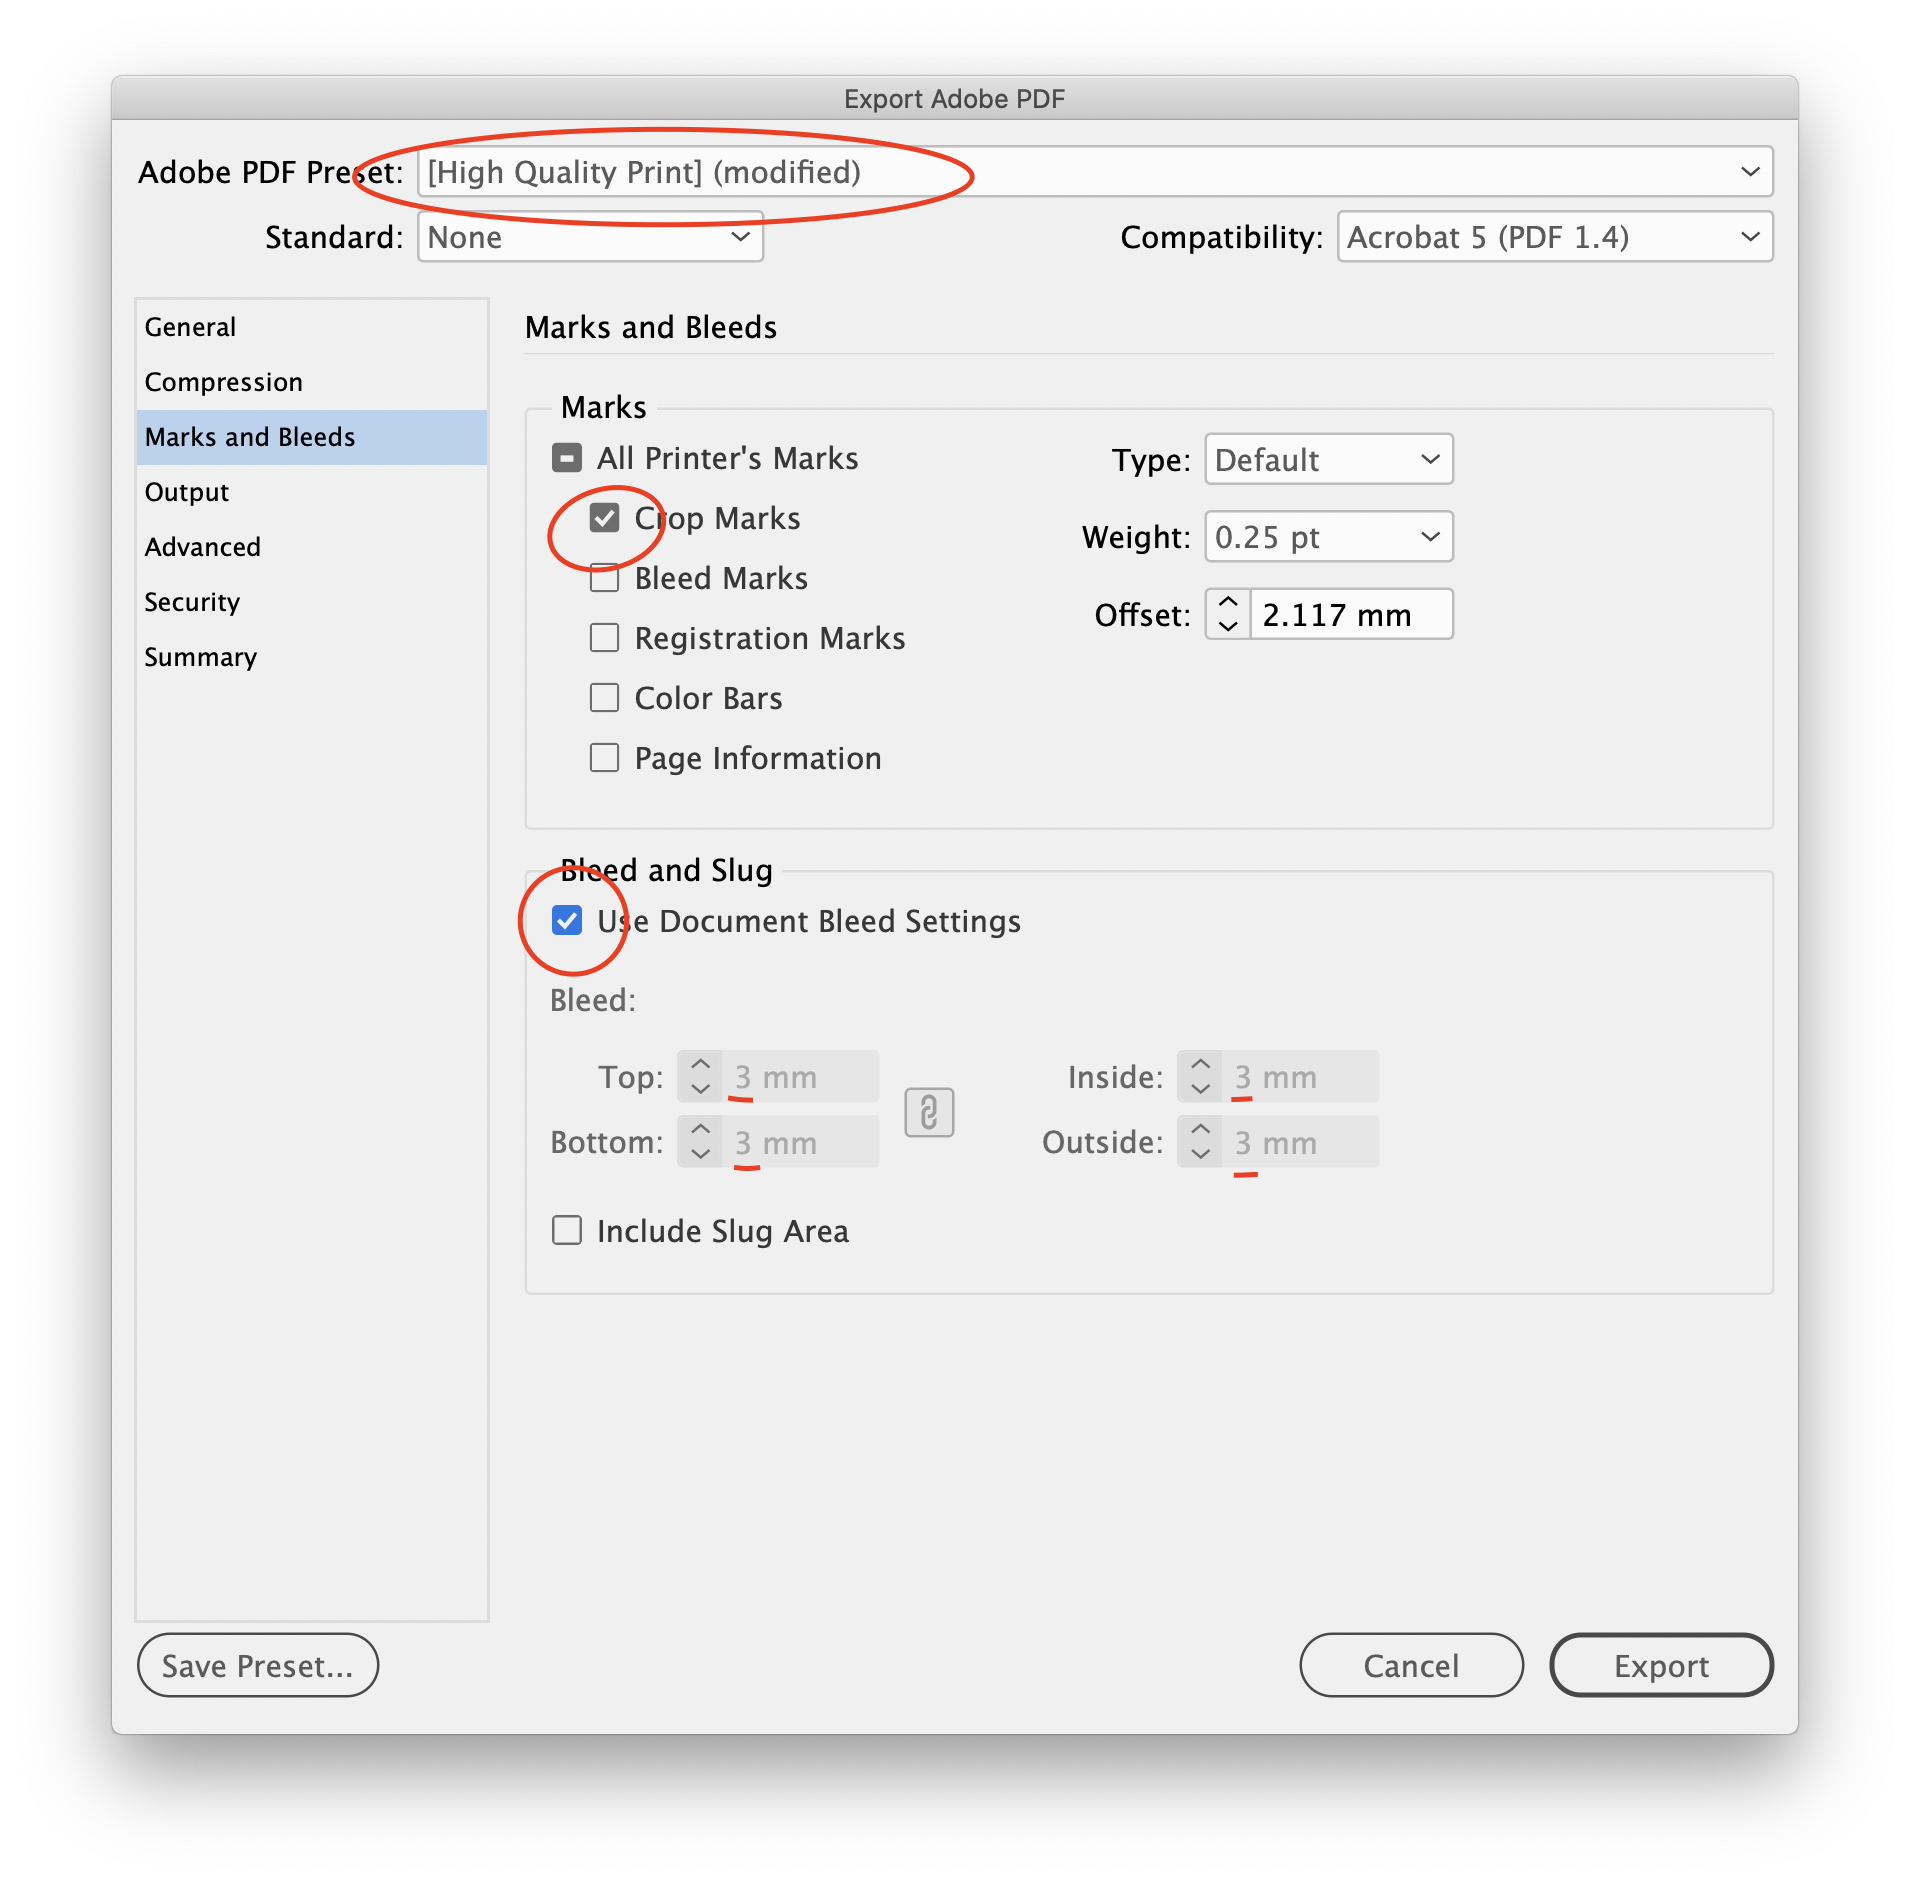
Choose Adobe PDF (Print) as the format and ensure you give your file a clear name you’ll recognise (e.g. Yearbook2025_PrintReady.pdf).

Ensure your settings match the example above before exporting
REVIEW YOUR PDF
Before sending it off:
-
Open the PDF in Adobe Acrobat (not just Preview or your browser).
-
Zoom in on text and images to make sure they’re crisp.
-
Check that bleeds, margins, and page order are correct.
SEND IT TO US!
Once you’re confident everything looks perfect, send the PDF to us at ar*****@***************om.au.
It’s always a good idea to keep a backup copy of both your PDF and your packaged InDesign files in case adjustments are needed.


