COLLABORATING ON A YEARBOOK IN CANVA: How to Work on Individual PDFs and Combine Them into One Project
Creating a yearbook is a big task, especially when you’re working with multiple people. Whether it’s teachers, students, or school staff helping out, collaboration is key — and Canva makes it easier than ever.
A great way to divide the workload is to have individuals work on specific pages or sections as separate PDF files, and then combine them into one overall yearbook project.
Here’s a step-by-step guide to doing just that:
Step 1: Plan the Yearbook Layout and Assign Pages
Before jumping into Canva, start with a clear layout plan:
Decide how many pages your yearbook will have.
Assign specific sections (e.g. Sports, Class Photos, Events, Awards, etc.) to different team members.
Keep a master spreadsheet or document with everyone’s page numbers, responsibilities, and deadlines.
Tip: Ensure all contributors use the same page size (e.g. A4) and orientation (portrait or landscape) to make combining files easier later.
Step 2: Have Contributors Design Their Pages in Canva
Each contributor should:
Create their assigned page(s) as a new Canva design.
Use consistent margins, fonts, and colours to keep the final book cohesive. (You can download our templates here)
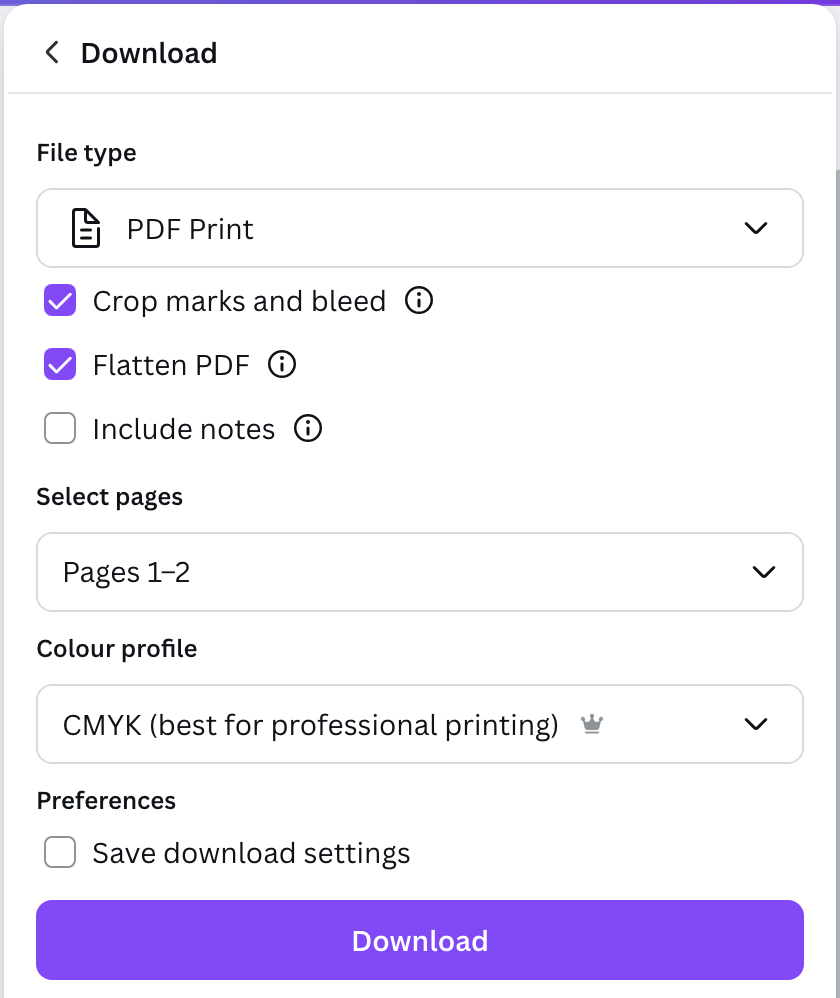
When finished, download their pages as PDF Print files with:
Crop marks and bleed turned on.
Flatten PDF checked (for better compatibility).
RGB colour profile (or CMYK if you’re using Canva Pro and planning to print professionally).
They can send you their completed PDF files for final compilation.
Step 3: Create the Master Yearbook File in Canva
Once you’ve received all the individual PDF files:
Open Canva and start a new design with the correct dimensions for the yearbook.
Add enough blank pages to match the total number of pages you’re compiling.
Tip: Add page numbers early on if you’re planning to include them.
Step 4: Import the Individual PDFs into Canva
To add each contributor’s work into your master file:
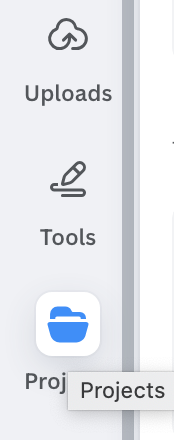
Upload each contributor’s PDF file into Canva via either the Uploads or Projects tab.
Once uploaded, drag and drop each page from the PDF onto the appropriate page in your master yearbook file.
If you’re using Canva Pro, you can click to import PDF pages directly into your design from the upload.
Step 5: Adjust and Finalise the Design
Once all pages are imported:
Check alignment, spacing, and margins.
Make sure all fonts and colours appear correctly.
Standardise any headers, footers, or page numbers.
Proofread for consistency and typos across all pages.
Step 6: Export the Final Yearbook for Print or Digital Use
When you’re ready to export:
Click Share > Download.
Select PDF Print as the file type.
Turn on: – Crop marks and bleed. – Flatten PDF. – Use CMYK if available for professional printing.
Download and test print a copy before sending it to the printer or sharing it digitally with your school community.
Why This Method Works Well
✔️ Efficient Collaboration Everyone works independently without needing to edit the same file at once.
✔️ Easy Version Control You avoid overlapping edits and accidental design changes.
✔️ Flexible Compilation You can easily reorder, swap, or replace pages before finalising the book.
Final Tips
Create and share a page design checklist to ensure uniformity across designs.
Use a shared folder (e.g. Google Drive or Dropbox) for contributors to upload their PDFs.
Consider locking the layout in each page before importing to prevent accidental edits.
Need help setting up your yearbook project?
We offer custom Canva templates and support for schools, clubs, and communities. Get in touch and we’ll help you make your yearbook unforgettable!
 To add each contributor’s work into your master file: